
What is a “swipe file” and why do you need one for your content writing?

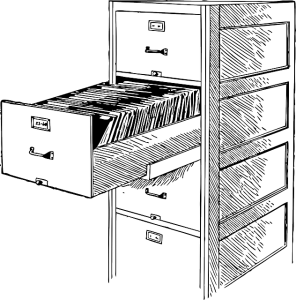
According to definition, a swipe file is a collection of already-written material that you have collected, that you save and organize which can be reviewed for inspiration and ideas, as well as for actual content, for your next writing task. In the good old days (pre-computer) this might have been called a clip file, as paper sources were consulted and the clippings were physically stored and organized in actual filing cabinets, in file folders, by subject/topic (for those saving printed materials rather than information in digital format, this is still a good option).
Here’s a well-known fact that accounts for the popularity of swipe files: Everyone who writes a lot for business purposes (advertising, sales, marketing, direct mail, blogs, web page content, etc.) will, from time-to-time, need help in coming up with topics to write about. While you should be careful not to plagiarize, you will often find an interesting angle to a subject in the writing of someone else.
It might be the body text of an article, or an attention-grabbing headline, or a good list or bulleted list of items. It could even be the image or the layout or color scheme. Whatever the reason(s), you need to save what appeals to you for consideration later when you sit down to your own writing projects.
Step 1: Just How Can You “Clip” Material for Your Digital Swipe File?
The first thing you are going to need is a way of capturing and saving information that you run across so that it can be organized and reviewed later.
There are a number of ways you could do this:

Simple copy/paste. One way to do this quickly and easily is to highlight the material and do a simple copy and paste of the material and save it somewhere as a file. One of the potential issues with that approach is getting images and other visual elements to copy over; in some cases it is not going to preserve the original appearance, especially if formatting elements are not saved correctly.
Screenshots. Another option – one that would capture the appearance as well as the content – is to take a simple screenshot and save it. But (depending on how exactly you go about it) only above-the-fold information (what is visible on your screen) may be captured, not information on other areas of the page. Another problem with this approach is that your screen capture will be saved as an image file, not as text information, which may limit what you can do with the screen capture.
Digital capture. A much better approach is to use a tool like the Evernote Web Clipper or the clipping extension for Microsoft OneNote, which will capture screen information in a variety of formats and file it automatically within each of these filing/capture systems.
Once you have a good web clipper installed, you can quickly and easily capture all kinds of digital information whenever you discover it, day in and day out!
Step 2: Develop a Storage Organization Strategy
Being able to clip information you run across is a great help – but only if you can find the information later when you need it.
To make that possible you will need to develop an effective way to organize your ever-growing set of web clippings, so that you can search it to find what you need.
Timely tip: Resist the temptation to create a huge number of folders/notebooks. This can make it difficult later on to find what you need, and can create problems in deciding where to file something in the first place.
For example, suppose you have two folders in your digital swipe file system, one entitled “Time Management” and the other entitled “Influencer Companies.” Now you are reading about how an important business in your industry set up training for new employees to help them be more productive at work and eliminate distractions. But where do you file that item – under “Time Management” or in the “Influencer Companies” folder?
A much better strategy is to keep the number of notebooks/folders as low (and general) as possible and instead use TAGS to enable you to retrieve information around specific topics. In the example above, you could file the information in a notebook called “Business Innovation” and tag it with the tags “Influencer Companies” and “Time Management” (and perhaps others as well). Evernote allows the creating of tags on the fly, and OneNote allows you to search for specific text words/phrases, so both can be adapted for this approach.
Step 3: Develop Sources of Information to Monitor
OK, you have your digital swipe file clipping tool(s) installed, and you have a good handle on the organizational structure you will need — now you need to develop some sources of information to monitor.
This can be done simply by doing some internet searches to find industry blog sites, forums and the like. Notable companies, or sites maintained by industry influencers. You want to draw up a list — over time it will grow — of as many sites as you can find that might have information you might find helpful. Even online magazine and news sites can be a big help. Look everywhere for any help that you can get — the more sources you can monitor the better off you will be!
Step 4: Set Aside Time To Clip
Even if you have everything ready, including good sources of information, none of this will help you unless you actually set aside time to read and clip (file away) the good stuff.
You have two ways of doing this…
One approach is to set aside time to read fully (in-depth) and clip what you find valuable. This approach will ensure that you fully read what you have clipped — but it will greatly reduce the number of items that you will be clipping in a given period of time.
The other approach is to set aside a given amount of time to clip (let’s say an hour a week) and clip as much as possible that might be helpful later. With this approach, you don’t try to read everything in detail now (and you won’t remember all that detail anyway). Instead you will skim the content to determine three things: 1. Is the content worth clipping? 2. If so, what folder should it be clipped in? and 3. What tags should be associated with it to facilitate future retrieval?
If you don’t want to think about where to file it or what tags to use, you can just set up a general “holding” folder for newly-clipped material, that can be reviewed later when you have the time, to assign tags and to file it more properly, once you have read through it more completely.
Step 5: Set Aside Time to Review Your Clippings, Outline and Write!
If you have followed all of the above steps, within short time your digital swipe file will be bulging with lots of useful content.
Now you are going to need to schedule some time to review all of this material, reading more fully what is there, making sure that appropriate tags have been selected for that content, and that it has been filed in the correct (or most appropriate) notebook or folder.
With that digital swipe file content in front of you, you can easily incorporate that information in your next content project, construct a good outline, and get started writing!